How to create Product Category in Magento 2?
Product Categories are the backbone of every online store. A store owner always has to spend the time to research, plan, and create suitable categories for the products. So, the owner can effectively manage their store product. Good product categories not only help a store owner to manage the product, but it also helps the customers to find the product on the online store website easily.
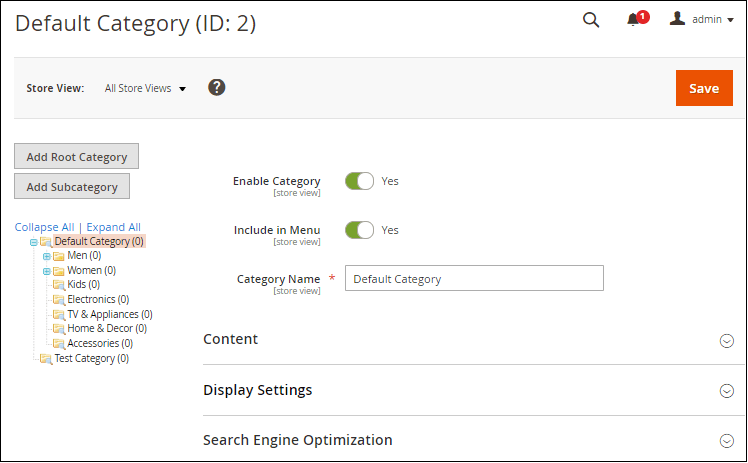
it is very easy to create product categories in Magento 2. Content Management System (CMS) in Magento 2 provides lots of support in creating new categories. Before creating the categories, we should have basic knowledge about the root-category and sub-category.
Root-Category and Sub-Category
When we start creating the category structure for a new Magento 2 website, there is only one root category, i.e., Default Category. All the sub-categories are nested below the root category. Root category is the highest level of the catalog, and the online store can have only one root category active at a time.
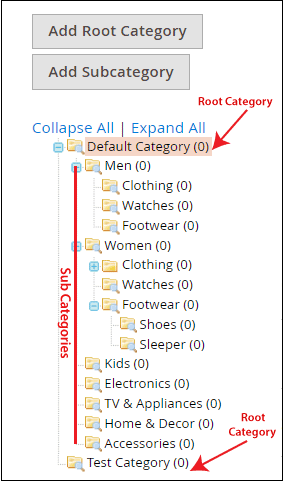
Store products are organized as a sub-category under the root category. We can change the name as well as arrange the position of any root-category or sub-category by using left click and drag them.
Setup the store category in Magento 2
One of the key features of Magento 2 CMS is that it supports for multiple stores. With a single Magento 2 installation, we can host and manage various stores that are completely different from each other. Each store pulls its products from a Root Category. There are some key points, which we need to know while setting up the store category:
- We need only one root category if we have only one online store.
- If we are running the various online stores, but all these are selling the same products, in that case, we can assign the same root category to all of them.
- If we want to have different stores, which carry different products, then we have to create a Root Category for each store.
Once the Root Category is setup, then we can add more sub-categories and also organize our product line. These categories need to be set up first before setting up the store.
How to create Root Category in Magento 2?
To create a root category in Magento 2, follow the below steps:
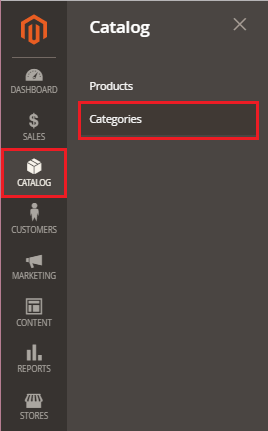
Step 1: On the sidebar of Admin Panel, Go to Catalog >> Category.
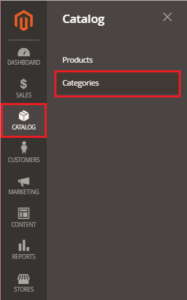
Step 2: Click on “Add Root Category” to create the root category.
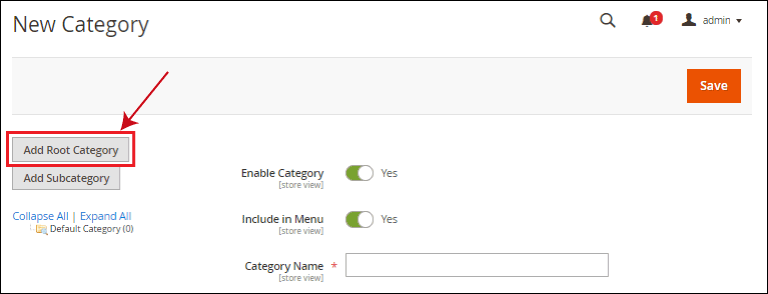
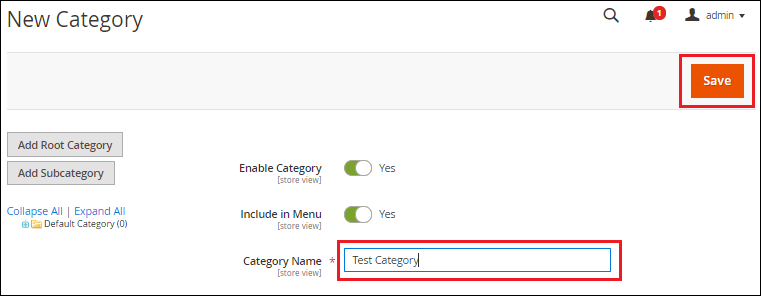
Step 3: Fill the information in required fields such as category name and click on Save.
There are six tabs available, which can be used to set options in this root category.
Content – It generally includes the category images and description. We can also add the CMS block here.
Display Setting – It determines how your products are displayed on the category page. So, we can select the way how the category shows up on the frontend.
Search Engine Optimization – Search Engine Optimization for the category includes the URL key, Meta title, Meta keywords, and Meta description.
Product in Category – Here, we assign products to a given category. If we have one store being hosted from our Magento install, this would likely include all of our active products.
Design – It adds our custom design options to a category.
Schedule Design Update – It keeps the schedule updated information.
How to create Sub Category in Magento 2?
Step 1: On the sidebar of Admin Panel, Go to Catalog >> Category.
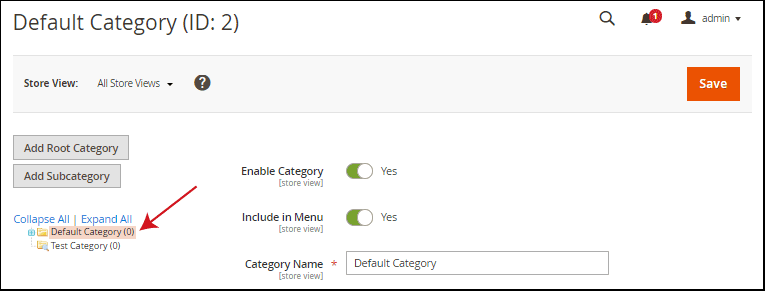
Step 2: Firstly click on the Root category under which we want to create a sub-category, and then click on “Add Subcategory” to create the sub-category.
For example: If we want to create a sub-category “B” under the category “A”. First, we need to click on category A, and then click on Add Subcategory.
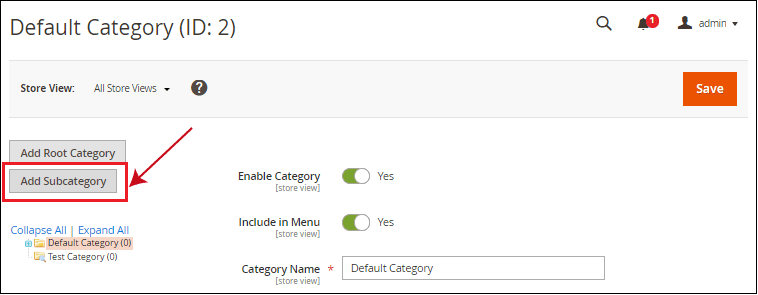
Step 3: Click on the Add Sub Category.
Step 4: Fill the information in required fields such as category name and click on Save.
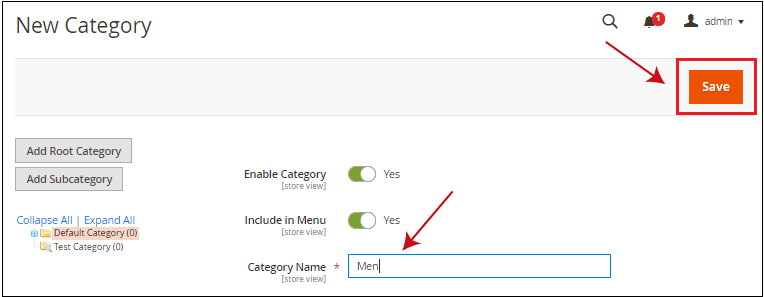
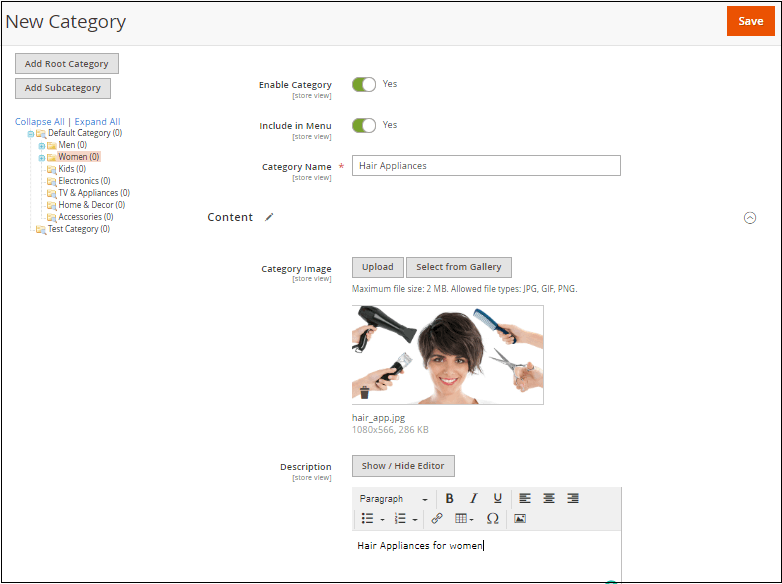
Step 5: Inside the Content section, we can upload images and description, which will be set as a thumbnail image. While creating a new category, explore the Content section, select the image, and add a description, then click on Save.
How to apply New Root Category in your store?
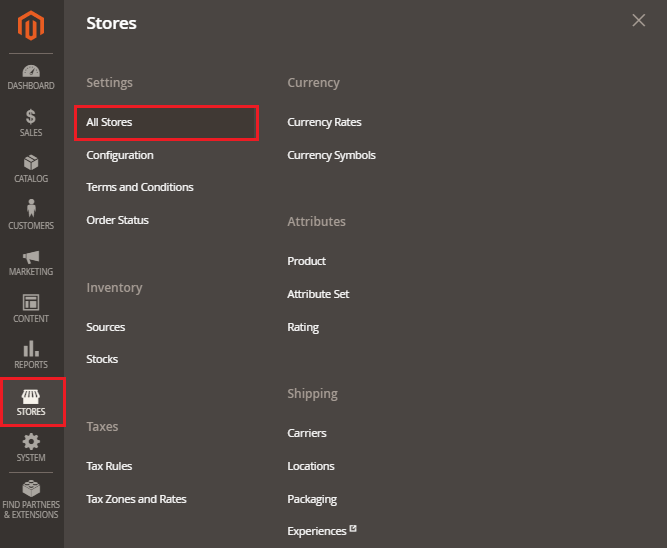
Step 1: On the Admin Panel sidebar, Go to Stores >> All Stores
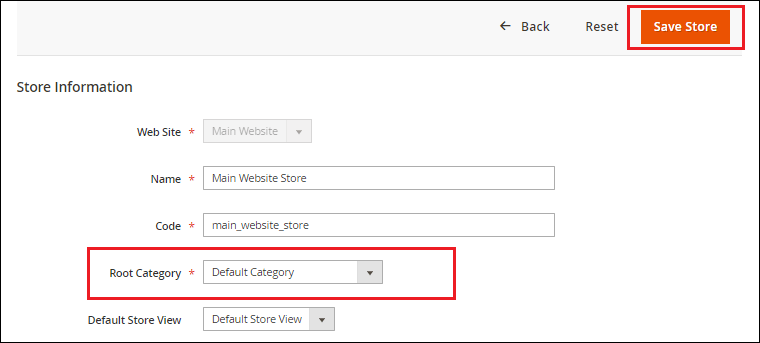
Step 2: Here, click on the Main Website Store.

Step 3: Select the root category that you want to assign and then click on the Save Store button.
That’s all about how to create a category and configure it in Magento 2. It will be visible like the below screenshot to the customer.

